CLICK HERE FOR FREE BLOG LAYOUTS, LINK BUTTONS AND MORE! »

Thursday, October 22, 2009

Feature Friday: Teri’s Frugal & Free Decorating


It’s Friday again! How does the week speed by like that? I hope you’ve enjoyed our posts this week. This blog is a total outlet for me, so thanks for coming along for the ride.


Since it IS Friday, it’s all about the letter “F” today.


I went to drop two semi functional tv’s off at the local thrift store, and of course had to go in. Usually it is just a Mom kind of thing to do, but this time the whole fam was along for the ride. They found as many treasures as I did, and we left with an entire cart full of stuff. Ummm, hello, I thought the point of dropping stuff off was to get rid of more than you are accumulating.


Just wanted to share a couple of my finds and how I put them to good use. My dresser has been a no man’s land of junk accumulation, but it in now a beautiful haven for found items and things I “shopped the house” for. Previously the only thing on the dresser was the white lantern with the candle in it, I however stole the rocks out of another candle holder because this one needed more texture and more height.


October 2009 143


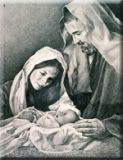
My dresser is one I inherited when we sold my grandparents house, I love it, but it is in much need of some tlc. I have been reading so much great advice about decorating (especially from the Nester on Nesting Place with her 31 Days to a Better Dressed Nest), so I completely rethought what to do here. I got this great shaped mirror on my trip with the fam to the thrift store (only $4), and hit it with some Old English Scratch Cover (don’t worry, it’s not touching that gorgeous crocheted runner), and it shined it up nicely. The lantern I mentioned already. The “sisters” were a gift from my very dear Friends (capitalized for emphasis on what truly wonderful women they are) when I moved last year, but had previously been residing in my living room. The bottom book I bought at a used book store for a dollar, and was going to use the sketches in it for a project, but I think it needs to stay here. The green book was one of my favorite purchases in this thrift trip, it was only 50 cents, and it adds the punch of color the dresser needed, but my favorite thing about it was the title….it’s called “The Strumpet Sea”, how funny is that (if I got the general gist it’s a book about a sea captain’s journey)? Gotta love anything that has the word strumpet in the title. The beautiful crocheted runner and doily were from my Grandma’s collection, I don’t know if she made them or if my Grandma Great did, but I love them none the less. The beautiful bowl is from my Grandma’s wedding china set, I robbed it from the china hutch in the other room. Hope you’ve enjoyed the brief glimpse into my room. How does it look?


Woo hoo!!! Today is Free Friday at my local thrift store. They put out stuff that they won’t sell because it needs a small repair or that has been in the shop a while and it’s all free. I’ve gotten some great stuff before. One of these day’s I’ll post about it.

Having issues with Blogger last night, sorry this is later than usual getting posted.


I’ll be linking up to the fabulous linky parties below, click on them to see some other great frugal finds!!!

Frugal Friday on Life as Mom and Frugalicious Friday on Finding Fabulous


Funky Junk's Saturday Nite Special

Guest Day Thursday: Anna’s Chairs

I asked my darling friend Anna to do a post about her remade chairs. She is so cute, and it was a fun idea. Here she gives us a great tutorial about her chairs. Thanks Anna!!! (by the way, watch for more from her next week)

Teri

My Danish roots run deep in me, which is what inspired me to do this project. To go along with the white pottery and authentic Copenhagen china plates collected from the travels to Denmark, I was motivated to change my hand-me-down dining room set from

THIS

clip_image002

…To something new. I cannot take all the credit for the project because the hand-me-downer aunt was the one coaching me along as this was my first attempt at reupholstering.

My tools included:

1 yard each of fabric of my choice

Flathead screw driver

Drill

Staple gun

Needle & thread

Sewing machine

My husband’s big strong muscles

First I removed the seat and back of each chair with the drill.

Using the screwdriver, I removed the staples holding the fabric on the underside of the seat. I also unpicked the seams from the backs of the chair.

From the fabric removed, I unpicked all the seams and used that fabric as a template for my new fabric.

It was then easy to trace onto and cut out my new fabric.

With my sewing machine I sewed all the fabric together, leaving on of the long edges of the back open so I could slip it over the real back

Just for fun, I added another layer of foam to add some extra cushion on the seats.

I fit the new fabric onto the foam and board that made the seat. When I flipped it over, I gently tugged the fabric over the edge and stapled it directly to the board. I did the corners first, then the sides. It took me a couple tries to the tension on the corners and sides just right. I found that when I stapled the corners first, it was easier to finish the sides.

For the backs, I slipped the fabric over the top, and hand whip stitched the bottom edge.

After soliciting my husband and his big muscles, we drilled the pieces back on the chair frames. And bippity -

Boppity –

BOO!

clip_image004

There are several silly nips and tucks that my eye always directly goes to when I look at my new chairs. But in the words of my mom, “It’s perfectly imperfect. And therein lays the charm.”

Wouldn’t it be so fun to go to dinner there and be assigned your own special chair? Thanks again Anna!!!

This post linked for Anna at:

DIY Day @ A Soft Place to Land

Furniture Feature Friday @ Mustard Seed Creations

Wednesday, October 21, 2009

What's Cookin' Wednesday: Micki's kitchen

Okay, Whatever Goes Wednesday, has officially changed. We aren't apprently creative enough (aka, we don't have enough time), to fill every day with projects. Wednesdays will now be known as What's Cookin' Wenesday, and we will share some of our favorite recipes with you....hopefully you will tell us where we can find some of your favorites.


Since it is fall and getting colder in a lot of places. I decided to post one of my favorite soup recipes. It's my mother in laws potato soup and it's soooooooooooooooo yummy!!!


In bottom of stock pot melt 1 cube butter and cook one large diced yellow onion until soft, do not brown. Then add enough diced potatoes to fill stock pot 3/4 full. Cover potatoes with chicken broth and add a little extra bullion for extra flavor. Cook until potatoes are soft. Then use immersion blender or hand mixer to mix ingredients and puree potatoes. Then add enough warmed half and half to make it the consistency you want it to be and enjoy. It's great topped with shredded cheddar and served with fresh french bread!!!
Linked to these great parties:
Foodie Friday @ Deisgns by Gollum and

DIY Day @ ASPTL

Monday, October 19, 2009

Tadpole Tuesday: Micki's Change Bank

Okay since Tadpole Tuesday is all about our kids crafts or the beginning of a craft. I decided to make it both today. My kids have wanted something to put change in on there dresser. And me being the craft mom, I could not just buy them a bank. I had to come up with a craft solution. So we found these recipe boxes on clearance at Michaels for 50 cents and got some clearance wrapping and tissue paper at Target. Then we used our favorite crafting tool...Mod Podge and went to town. It is not quite done yet....but I will post a picture when it is complete.


This has been linked to DIY Day @ ASPTL, click on the button below to see a lot of other really creative projects.


DIY Day @ ASPTL


Mystery Monday:Teri's Laundry Tip

Okay, first off, I DO NOT claim to be a stellar homemaker. I am a disorganized mess most of the time. I do have one little laundry helper that I LOVE! I sometimes don’t sort the laundry quite as good as I should, and even when I do sometimes something sneaks in where it shouldn’t. I also have a preteen who does her own laundry, enough said. Needless to say, I have had pink underwear and pale blue socks that used to be white from time to time. I found something that has pretty much completely eliminated that problem. It’s called Shout Color Catchers, and it’s made by the same people that make Shout Stain Remover.

This product has been a life saver for me! It does add a little cost to my laundry, but not a giant amount. In every box there is a coupon for $1 off 2 boxes. If I use the coupon and buy 2 boxes at a time, it costs me about 18 cents a load. I have rarely found this on sale, but it’s worth the added pennies per load to me. If I am washing a load that has new clothes (especially jeans) in it, sometimes I will throw in two. They go right in the dryer with your load of clothes, so you don’t have to worry about fishing it out before you dry your clothes. Here is what they look like when they come out of the dryer after catching all the loose dye, one is from a red load and one from a dark load.


So, here’s the mystery part of Mystery Monday:

What are some of your best laundry tips?